Happy Spring!
I am so happy to be sitting in the camper finally making this post. It means the last three weeks of hard work, sweat, pinterest-ing, and much decision making is finally behind me…at least for now. Let’s call this first round of renovation- round 1.
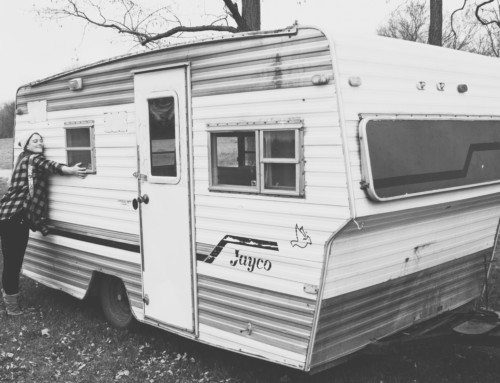
Last June after a pandemic, soaring prices of campers, and just a lot of searching, we finally bought our second camper. Our first camper was SO loved. If you are new here or haven’t seen our very first renovation you can read more about that here.
Selling the Jayco was bitter-sweet. I missed it after it was gone, and second guessed if we had done the right thing by selling it. But then, along came the Zinger.

When we first bought it, the brown was up for debate. We said it was fine for now, and moved on with our busy summer. In the fall, I took out the brown blinds, and took off a piece of brown trim around the middle of the wall on the slide out. A couple weeks later, I painted the brown trim strips on the ceiling white, just to brighten it up a little bit. I didn’t touch anything else until this spring. And then, a couple weeks ago, I decided I was JUST going to work on the slide out.


The first thing I noticed I didn’t like when we looked at the camper was the slide-out trim. It was dated, even though the trailer was only a 2019. I figured that was an easy way to update it so we started with that first. We found this product at Menard’s that worked perfectly without having to stain anything.

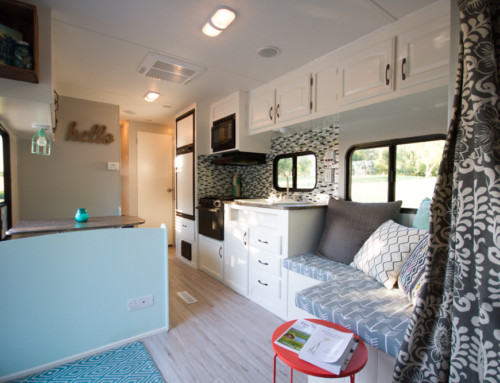
The main update to really make this space brighter was simple- paint. In a camper I like to sand the walls down a little with a sanding block first. Then a coat of primer before paint. It dries in an hour, and the walls are ready for paint. When searching for a color pallet, I knew I wanted something that brightened up the space. I came across this color palette from Magnolia and fell in love. Of course, magnolia.


I wanted to bring in some earthy elements- greens and wood tones. I knew that corner pantry was the perfect starting spot for this 1905 green that I am in LOVE with.


The Shiplap white is a really great white. I used this paint from Lowes and they color matched the magnolia Shiplap for me. I purchased two gallons for all the main spaces and bedroom. The second gallon is still over half full, I’m hopeful it’s the perfect amount for the bunkhouse when I get to that after I step out of the capmper space for a while and get some painting energy back.
For the green, I bought a quart of the Magnolia home paint in 1905 Green.
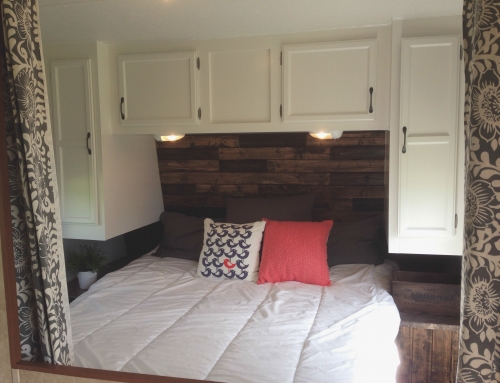
The slide-out was brighter, which made the rest of the camper look SO dark. So I kept painting. I painted the wall above the trim on the slide. That wall goes into the bedroom, so I painted the bedroom wall. Then the other bedroom wall , which goes into the kitchen. Once the walls in the bedroom were painted, I realized the cabinets needed to go bright white too. I just really wanted a cozy bright bedroom. So those got done too.

While I was painting, we started researching window treatments. I liked the look of curtains, but I really wanted privacy when we were camping close to other campers. We decided to go with traditional RV blinds. While they aren’t super lovely, they do their job of keeping out the light, and giving us privacy. I really like the black on black windows. Ian built me some barn wood boxes to hide the top of the blinds, which I feel really gives the space a little something extra.
I ended up also recovering the dinette cushion backs. I left the seats leather, for ease of cleaning, and I actually like the two tone, and how they match the couch. At some point, we may end up removing this dinette and putting something else here, but for now, it stays.


I found this photo on Etsy and fell in love. I made it big and had it printed at Smallwoods.

This light is my favorite! If you replace an RV light, make sure it has an on/off switch so you can turn the light off!

Bringing back little elements like rocks from beaches we’ve collected along the way makes it feel like home.


Lastly, the camper now has the front and main side decals removed. I am still in the process of getting the goo off the front, but after many tries I finally found a product that worked. This process was by far the hardest and worst part of the entire renovation. Every step that something was tedious or hard, it was all not half as bad as removing the decals. I knew they had to go though. I am currently searching for mountains, or some other type of decal that we can put on the side and front to add a little personality.
If you are removing decals, I 1000% recommend this adhesive remover product. Dont even mess around or waste money on anything else.

Overall, I spent around $700 for round 1 of renovation. Round two will be painting the kitchen cabinets, which I’m thinking about going GREEN. Lastly, the bunkhouse and bathroom will be done as well.
This space feels so much more like home, and I cannot wait to spend camping trips and summer nights in our yard out here. If you made it this far, thanks for following along with us! Please let us know if you have any questions about anything we’ve done here!

Leave A Comment